m (Sequenced Pieces of Heart, following CamelChip's lead.) Tag: Visual edit |
(Removed null map section, added incomplete tag and explanation) Tag: Visual edit |
||
| Line 11: | Line 11: | ||
Kinolangdanzel03 |
Kinolangdanzel03 |
||
| − | Kinolangdanzel04}} |
+ | Kinolangdanzel04}}{{Incomplete}} |
| + | Walkthrough needs to be updated for the 6.5 redesign. |
||
Kinolangdanzel is a large Dwemer Ruin directly north of the [http://www.uesp.net/wiki/Skyrim:Orphan's_Tear Orphan's Tear]. It contains 4 samples of [[Gold Dust]], 4 [[Piece of Heart|Pieces of Heart]], the [[Staff of Skulltula]], the [[Skull Hammer]], [[Zelda's Lullaby]], and the [[Ocarina of Time]]. It also connects to the [[Link Between Worlds]]. |
Kinolangdanzel is a large Dwemer Ruin directly north of the [http://www.uesp.net/wiki/Skyrim:Orphan's_Tear Orphan's Tear]. It contains 4 samples of [[Gold Dust]], 4 [[Piece of Heart|Pieces of Heart]], the [[Staff of Skulltula]], the [[Skull Hammer]], [[Zelda's Lullaby]], and the [[Ocarina of Time]]. It also connects to the [[Link Between Worlds]]. |
||
| Line 28: | Line 29: | ||
===Kinolangdanzel=== |
===Kinolangdanzel=== |
||
| − | When you arrive, you will be at the bottom of a flooded elevator shaft, with water pouring from above. To the south stands a locked door that leads to Kinolangdanzel Shrine that can only be opened after you complete the dungeon. To the east is a door that leads into a room that contains a [[Gold Skulltula]], two [[Forgotten]], some Dwarven arrows, an enchanted Dwarven Bow, and a dresser that contains the [[Dwemer Songbook]]. Proceed down the western corridor to arrive at an elevated ramp with a door at the top. The door leads to a square-shaped room with a pillar in the center and two [[Stalchild]] |
+ | When you arrive, you will be at the bottom of a flooded elevator shaft, with water pouring from above. To the south stands a locked door that leads to Kinolangdanzel Shrine that can only be opened after you complete the dungeon. To the east is a door that leads into a room that contains a [[Gold Skulltula]], two [[Forgotten]], some Dwarven arrows, an enchanted Dwarven Bow, and a dresser that contains the [[Dwemer Songbook]]. Proceed down the western corridor to arrive at an elevated ramp with a door at the top. The door leads to a square-shaped room with a pillar in the center and two [[Stalchild|Stalchildren]], two [[Stalfos]], and a [[Skulltula]] waiting within. On the north side of the pillar is a chest that contains [[Small Key 1]], which opens the locked door on the western side of the room. |
Go through the door and proceed down the corridor. You will find seven Stalchildren and a chest. Proceed south to find another Stalchild and another door. Go through the door to find six Skulltulas, and two Forgotten. On the north side of the room is a Dessicated Corpse that contains [[Small Key 2]], which opens the locked door to the south. Go through the door and proceed down the corridor and find six Stalchildren, a Stalfos, a Forgotten, and a chest. |
Go through the door and proceed down the corridor. You will find seven Stalchildren and a chest. Proceed south to find another Stalchild and another door. Go through the door to find six Skulltulas, and two Forgotten. On the north side of the room is a Dessicated Corpse that contains [[Small Key 2]], which opens the locked door to the south. Go through the door and proceed down the corridor and find six Stalchildren, a Stalfos, a Forgotten, and a chest. |
||
| Line 62: | Line 63: | ||
===The Bow of the Great Sea=== |
===The Bow of the Great Sea=== |
||
| − | Pull the lever that leads to Kinolangdanzel Tower, and open the door to Skyrim. Proceed north up the ramp that leads to the top of Kinolangdanzel Tower. Approach the locked chest half-buried in snow, and unlock it with the Tower Key. The chest will contain the [[Bow of the Great Sea]]. Travel back down the ramp and activate the small, wooden rowboat to go back to the Orphan’s Tear. |
+ | Pull the lever that leads to Kinolangdanzel Tower, and open the door to Skyrim. Proceed north up the ramp that leads to the top of Kinolangdanzel Tower. Approach the locked chest half-buried in snow, and unlock it with the Tower Key. The chest will contain the [[Bow of the Great Sea]]. Travel back down the ramp and activate the small, wooden rowboat to go back to the Orphan’s Tear.<imap map-id="18620"></imap> |
| − | |||
| − | == Interactive Map == |
||
| − | <imap map-id="18620"></imap> |
||
== Background and Inspiration == |
== Background and Inspiration == |
||
Revision as of 03:09, 26 December 2017
Incomplete
This page is incomplete and needs more detail or information.
Walkthrough needs to be updated for the 6.5 redesign.
Kinolangdanzel is a large Dwemer Ruin directly north of the Orphan's Tear. It contains 4 samples of Gold Dust, 4 Pieces of Heart, the Staff of Skulltula, the Skull Hammer, Zelda's Lullaby, and the Ocarina of Time. It also connects to the Link Between Worlds.
Within the dungeon are the remains of a small, failed adventuring party, who were bewitched by the dungeon and wrote poetry instead of writing journals.
Walkthrough
Orphan’s Tear
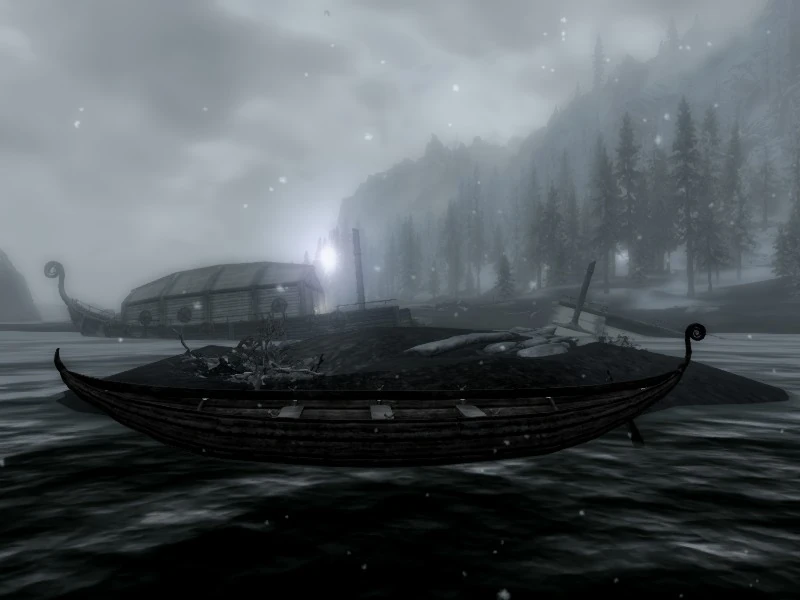
To get to Kinolangdanzel, it is recommended that you first go to a small island west of the Orphan’s Tear. On the west side of the island is a small, wooden rowboat with a pink fairy fluttering above it. Approach the boat and activate it to travel to Kinolangdanzel Tower.
Kinolangdanzel Tower
When you arrive at the base of Kinolangdanzel Tower, you will be facing the entrance to Kinolangdanzel Tower. To the north is a snowy ramp that leads to the top of Kinolangdanzel Tower. At the top of Kinolangdanzel Tower lies a chest half-buried in snow that can only be opened after you complete the upper dungeon of Kinolangdanzel. Proceed back down the ramp and enter Kinolangdanzel Tower’s large doors. When you enter, you will be in a Dwemer elevator shaft. Pull the lever in the center of the room to descent into Kinolangdanzel.
Kinolangdanzel
When you arrive, you will be at the bottom of a flooded elevator shaft, with water pouring from above. To the south stands a locked door that leads to Kinolangdanzel Shrine that can only be opened after you complete the dungeon. To the east is a door that leads into a room that contains a Gold Skulltula, two Forgotten, some Dwarven arrows, an enchanted Dwarven Bow, and a dresser that contains the Dwemer Songbook. Proceed down the western corridor to arrive at an elevated ramp with a door at the top. The door leads to a square-shaped room with a pillar in the center and two Stalchildren, two Stalfos, and a Skulltula waiting within. On the north side of the pillar is a chest that contains Small Key 1, which opens the locked door on the western side of the room.
Go through the door and proceed down the corridor. You will find seven Stalchildren and a chest. Proceed south to find another Stalchild and another door. Go through the door to find six Skulltulas, and two Forgotten. On the north side of the room is a Dessicated Corpse that contains Small Key 2, which opens the locked door to the south. Go through the door and proceed down the corridor and find six Stalchildren, a Stalfos, a Forgotten, and a chest.
Proceed further down the corridor to find another Stalchild, two Forgotten, and a door. Go through the door to find two more Forgotten and a Skulltula in a room with a collapsed ceiling. On the north side of the room is a pillar with the first Piece of Heart on it. On the eastern side of the rubble is a chest that contains Small Key 3, which opens the locked door to the east. Open the door to find two Stalchildren, two Skeletons, and a chest. Further down the corridor are six Stalchildren, a Forgotten, and a door.
Open the door and find a Poe, a Redead, a Stalchild, and two Forgotten in a square room. The south of the room contains a door and two adjacent pillars. In the south-western corner of the room is a hole in the wall, and in the south-eastern corner of the room stands a pillar with several levers on it. The hole in the wall leads to a crypt filled with several coffins, two Redeads, and two Forgotten. Only three of the coffins contain items, all of which are on the southern section of the room. One coffin contains a Gold Skulltula Token, another contains a bottle of Great Fairy’s Tears, and the last one contains a Sacred Shield and a dagger. At the base of the pillar lies a dead Argonian and the Mage’s Journal, along with some charcoal, a potion of cure disease, a torch, and either a spell tome for Candlelight or Magelight. Pull the south-eastern most lever on the pillar for the door to open. Behind the door is a Stalfos.
Continue down the corridor to find a Skulltula, six Stalchildren, a chest, and a Forgotten. Further down the corridor lies a door that leads into a slanted, collapsed, square room that contains a Stalfos, a Gold Skulltula, two Redead, and three Forgotten. The west side of the room contains a door, in the south-western corner of the room lies the second Piece of Heart, and in the north-western corner of the room lies a dead Nord carrying Small Key 5, which opens the western door, and the Warrior’s Journal . Tucked away in the corner past the Nord is a Gossip Stone. Open the door and proceed down the natural, rocky passage.
The passage opens up to a large, underground ravine, with a pool of water on the north side, with water falling from the ceiling into it. There is a Fairy next to the ramp, and in the water directly blow it there is a Block of Time, and a Hardy Strongbox containing Shard Note 1 of 24 and a Tarnished Shard. On the eastern side of the pool, under where the ramp starts, is a chest. Proceed up the ramp and through the passage to the north of the Orichalcum ore vein to find that the passage has been flooded. Swim through the flooded passage until you reach land. Along the way, there is a bottle of Great Fairy's Tears that can be found near a Falmer Pod. If it is not there, you may have to find a way to clip through walls and check the opposite wall for it as it might be under a second layer of ground. Turn right and go up the northern passage to be greeted by a Wolfos. Proceed through the corridor to the east to find a large, stony passage with a Falmer Nightprowler, and a Bokoblin lurking inside. Continue north down the passage to find four Falmer chests. In front of the easternmost chest lies a sample of Gold Dust, and behind the chest lies a Dark Essence. Go back up the passage and proceed down the glowing passage to the west. The passage leads into a square Dwemer room with a Redead, Gold Skulltula, two Moonstone ore veins on the north side of the room, a Gold Skulltula Token by a door on the south-western side of the room, and Dwarven equipment in the south-eastern corner of the room. The Redead may have wandered into the passage with the Falmer and Bokoblin. The south-eastern corner of the room includes two Dwarven Bows and a chest containing fifty Dwarven Arrows and the Tower Key. Go through the western door to find a large Dwemer room containing a Darknut who carries the Small Depths Key, a Forgotten, and a dead Wood Elf carrying the Scout’s Journal along with a second Gold Dust sample. On the eastern side of the room on a stone platform lies a Burial Mask. Proceed to the south to find a door that leads to a rocky passage with a Poe, a Stalchild, and a Journal next to a chest. Go back to the large room and enter Kinolangdanzel Depths by opening the door to the west.
Kinolangdanzel Depths
As you enter, you will be in a large, Dwemer corridor with a chest and a Forgotten. Proceed down the corridor to find two more Forgotten, two Stalchildren, and a Staltroop. Pressing onward and searching the right wall, you can find another Gossip Stone. Continue north to find a massive, Dwemer room filled with stones, water, a Stalchild, three Forgotten, a Hylian Ghost, a Redead, and a Stalfos, as well as dead Falmer and Chaurus. Carefully search the water for the third Piece of Heart. Proceed down the eastern passage to find two Stalchildren, a Hylian Scout, a chest, and another large, Dwemer room filled with three Forgotten, a Redead, a Stalfos, and a Staltroop. In the north-western corner of the room lies a third sample of Gold Dust underneath a chandelier. Continue through the eastern door to find a Stalchild and a chest. Proceed further down the passage to find two Forgotten and a Hylian Ghost. Proceed even further down the passage to find a square room with three doors on each wall, along with two Stalchildren and two Forgotten.
Continue through the western door to find a large, square, Dwemer room filled with a Redead and the Redead Knight who carries an enchanted Armos Greatsword and the Redead Key. The Armos Greatsword will have a unique enchantment: either Magicka Ravaging, which lowers an enemy's available Magicka for a short period of time, or Life Ravaging, which lowers all three of an enemy's attributes for a short period of time. In the north-eastern corner of the room lies Spell Tome: Summon Redead. Continue into the southern passage to find three Stalchildren guarding a fourth sample of Gold Dust and a chest.
Proceed through the southern door to find two Skulltulas, a Gold Skulltula, and Gohma, who carries Gohma’s Key, five Gold Skulltula Tokens, and the Staff of Skulltula, as well as miscellaneous loot. In the north-eastern corner of the room lies Spell Tome: Summon Skulltula.
Go through the eastern door by attacking the spider web to find two Stalchildren, a Staltroop, a Redead, two chests, and the Stalfos Knight, who carries the Skull Hammer, Spell Tome: Summon Stalchild, Spell Tome: Summon Stalfos, and the Stalfos Key. Proceed east to find a large, Dwemer room with a lone Stalhound roaming around inside.
Continue to the north to find a chest and another door. Open the door to be greeted by a Greater Darknut who carries a Dark Dagger, a Darknut Battlesword, the Darknut Key, and the final Piece of Heart. In the north-western corner of the room lies Spell Tome: Summon Wolfos.
Proceed through the western door to find yourself in the room with the three doors again. Enter the southern door to be greeted by two Stalchildren, a Lesser Poe, and a Hylian Soldier. Continue down the passage to find another Lesser Poe and Hylian Soldier. Proceed down the passage to find a collapsed Dwemer room with a Dwarven Spider Worker, a Hylian Soldier, and a Staltroop. Proceed down the northern passage to find a pile of rubble next to a chest. Go to the southern door and open it with the Darknut Key.
The final room is flooded, with the silhouettes of two Greater Chilfos and Silver Centurion visible. Defeat the Silver Centurion to get the Shrine Key. In the south-western corner of the room lies Spell Tome: Stalchild Thrall and Spell Tome: Stalfos Thrall. To the north of the south-western corner lies Spell Tome: Wolfos Thrall. In the south-eastern corner of the room lies Spell Tome: Redead Thrall and Spell Tome: Skulltula Thrall. Proceed south to the door that leads to Kinolangdanzel Shrine.
Kinolangdanzel Shrine
When you enter, you will be in a small room with a raised platform in the center. To the south of the platform lies an Ancient Chest, which contains a Note, a Red Ring, and Zelda’s Lullaby, as well as a spell tome for Ocarina Respite. Behind the Ancient Chest, on the raised platform, lies the book Archaean Horizon. In the center of the raised platform lies a metal pedestal, on which lies the Ocarina of Time. On the west side of the room lies a locked gate that can only be opened with the Song of Time. Proceed through the northern door to return to Kinolangdanzel.
The Bow of the Great Sea
Pull the lever that leads to Kinolangdanzel Tower, and open the door to Skyrim. Proceed north up the ramp that leads to the top of Kinolangdanzel Tower. Approach the locked chest half-buried in snow, and unlock it with the Tower Key. The chest will contain the Bow of the Great Sea. Travel back down the ramp and activate the small, wooden rowboat to go back to the Orphan’s Tear.
Background and Inspiration
Kinolangdanzel was the first dungeon to be added to Relics of Hyrule and debuted in version 3.0. It was built to house the Ocarina of Time.
The interior was remodeled and expanded from its original incarnation, replacing a simple corridor with a cave system.
The dungeon is designed to imply that it is built upon a geologic fault. Rooms are split, tilted, and shifted. This effect was accomplished by building the dungeon within Creation Kit, then selecting and moving half of it. The rifts were then filled in with rubble and stone. In version 6.5, the dungeon shifted and changed to reflect this.
A dragon was originally intended to guard Kinolangdanzel Tower, but was removed because of the dungeon's placement on the edge of the map and near a boundary that cannot be crossed.
Kinolangdanzel serves to pay loose tribute to Ocarina of Time. This was done through the prevalence of Redeads and Hylian Ghosts, as well as the presence of Gohma within the dungeon.
The name "Kinolangdanzel" is an anagram of "Link," "Zelda," and "Ganon."
Gallery
The boat near the Orphan's Tear that can bring the player to Kinolangdanzel.
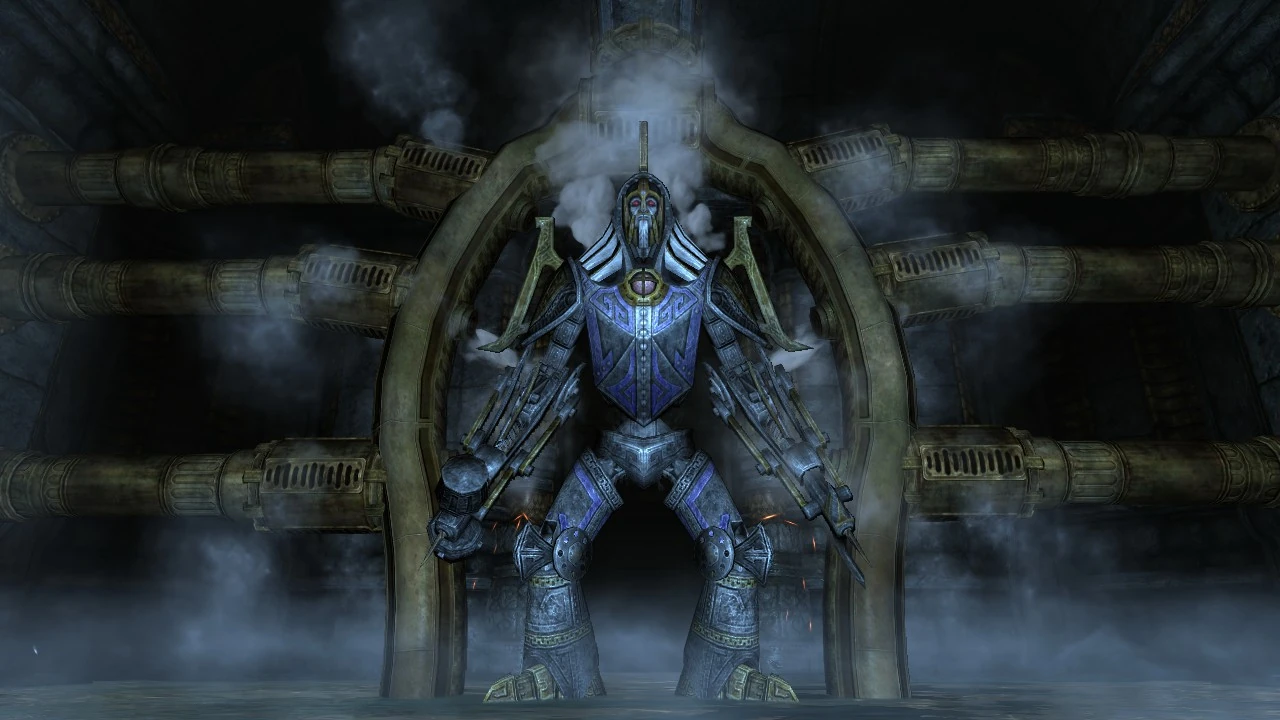
The Silver Centurion, lying dormant
Video

Relics of Hyrule Kinolangdanzel Trailer
Trailer for version 3.0, in which Kinolangdanzel debuted.

Relics of Hyrule- Kinolangdanzel
Remake of the trailer for 3.0, serving as an overview of Kinolangdanzel and its related content.

Kinolangdanzel Part 1 - Relics of Hyrule Video Guide
Part 1 of Kinolangdanzel walkthrough

Kinolangdanzel Part 2 - Relics of Hyrule Video Guide
Part 2 of Kinolangdanzel walkthrough

Relics of Hyrule- The Series - Episode 15 - Descent into Kinolangdanzel
The first episode of Relics of Hyrule: The Series that features Kinolangdanzel